

How to Enhance and Upscale Images with AI: A Complete Guide 2026
Have you ever found the perfect image for a project, only to realize it is too blurry to actually use? You try tweaking the clarity in a standard photo editor, but the image just ends up looking harsh and distorted. Traditional editing tools cannot create detail out of thin air. AI image enhancement tools like whisk ai, a game-changing remedy for digital creators, step in right here. They intelligently analyze the picture and generate missing details to transform blurry photos into compelling assets. You upload the file, sit back, and watch the crisp results flow in.
Why Traditional Sharpening Fails (and How AI Fixes It)
The Science Behind AI Image Quality Improvement
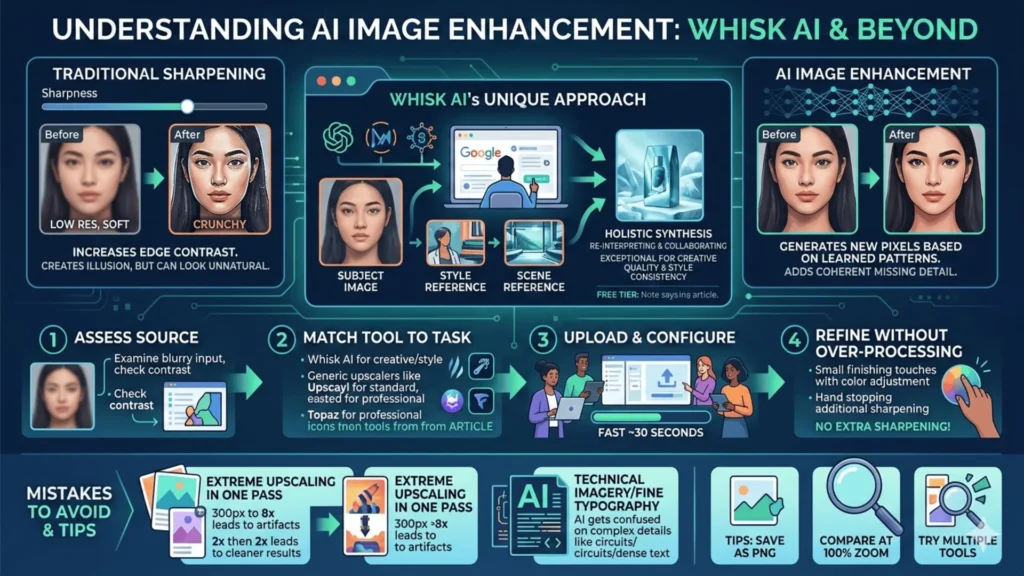
Most people instinctively sharpen a blurry image. It seems logical. However, sharpening in conventional editors doesn’t recover lost detail. It simply increases contrast along the edges. If you push it too far, you get white halos and an over-processed look. AI quality improvement takes a fundamentally different approach. The super-resolution algorithms generate new pixels based on learned patterns. It applies a statistically informed understanding of how facial features and lighting interact at higher resolutions. The result is added textural detail that feels coherent. Note that AI enhancement isn’t perfectly lossless. The model makes interpretive decisions.
What Makes Whisk AI a Unique Creative Collaborator
Whisk AI, a powerful platform for visual remixing, takes a more holistic approach. Most dedicated upscalers have one simple job. You give Whisk images as inputs instead of relying purely on text. The generative models synthesize them into something new. It re-interprets the image with a complete understanding of the subject.
Whisk AI’s Best Use Cases:
- Creative and design work: When you want the enhanced version to feel intentional.
- AI-generated images: When they need a second pass to add realistic detail.
- Style-consistent outputs: When visual coherence matters more than pure resolution gain.
Step-by-Step Tutorial: How to Improve Image Quality with AI
The specific interface varies slightly across platforms. The core workflow remains identical.
Step 1: Assess Your Source Material First
Look honestly at your source material. These platforms amplify existing details. An image with reasonable contrast will upscale much better than a poorly exposed file. Always start with the highest-resolution version you can find. A standard 600px file works perfectly as a baseline.
Tool Comparison Table: Choosing the Best AI Upscaler
| Tool | Best For | Free Tier | Upscale Max |
| Whisk AI | Creative, style-guided enhancement | Yes | 2x-4x |
| Upscayl | Photography, offline processing | Fully free | 4x-8x |
| Let’s Enhance | Web-based, quick upscaling | Limited | 16x |
| Topaz Gigapixel AI | Professional photography and print | Paid | 6x |
| Adobe Firefly | Adobe workflow integration | Limited | 4x |
Step 3: Upload, Configure, and Run
Open Whisk and upload your base image. Optionally add style references to guide the AI’s interpretation. The platform typically returns your finished results in under 30 seconds. You download the file, zoom in closely, and evaluate the crisp new details.
Step 4: Refine Without Over-Processing
Your enhanced image will likely need a very light finishing pass. You might need to adjust the white balance or crop the frame. Do not apply intense noise reduction or extra sharpening. The software has already added the necessary sharpness, so stacking more effects will create harsh haloing effects. Less is definitely more at this final stage.
Mistakes That Actually Hurt Your Upscaling Results
- Jumping straight to extreme upscaling: Going from 300px to an 8x upscaling factor in one massive pass introduces weird visual artifacts. Try staged passes for significantly cleaner results.
- Ignoring subject matter compatibility: Highly technical imagery like circuit boards can throw a wrench in the works.
- Treating AI output as final: The human step of judging whether something looks visually correct separates standard results from great ones.
Free vs. Paid AI Image Enhancement: Which is Worth It?
Free AI image enhancement tools are usually more than capable of getting the job done. Whisk AI’s free tier provides real access for creative upscaling. Upscayl is completely free and has zero usage limits. Where paid tools truly earn their cost is in scale and granular control. Paid software is usually required for massive batch processing. If you need to process hundreds of e-commerce photos, an enterprise tool makes absolute sense.
Frequently Asked Questions (FAQs)
When creators start using AI image enhancement tools, a few technical concerns constantly surface. Here are the clear answers to your most pressing upscaling questions.
Conclusion: The Future of Professional Visual Assets
AI image enhancement tools have matured incredibly fast. The platforms available now would have been considered absolute magic just 5 years ago. Platforms like Whisk AI have democratized a highly expensive workflow. The technology is your collaborator. Start with the best possible source file, choose a tool matched to your specific needs, and never skip the light finishing pass. The results are genuinely impressive, and you’ll hit the ground running on your next project.


